
Using Fly.io and NGINX for Proxying Obsidian Publish
Essays and updates on product, engineering, and AI by Chase Adams.
5 minute read
Caution
This post is a work in progress and is mostly incomplete. If you'd like to see some movement on it, feel free to reach out on Twitter or Discord
As someone who likes to hack on internet things, I decided that I wanted to serve my Obsidian Publish site through Fly.io using NGINX.
This is an exhaustive walkthrough of how to configure and deploy an NGINX app server with Fly.io to serve an Obsidian Publish site.
For this example, I'll be referring to my server_name and serving my site at notes.curiouslychase.com. Anywhere you see me reference server_name, make sure to replace notes.curiouslychase.com with your hostname.
Prerequisites
This tutorial is for anyone who has knowledge of working with code. It doesn't have to be strong knowledge, but you do need to be able to have some idea of how to use an editor and a terminal.
- Basic proficiency with a text editor (VS Code, Emacs, Vim, etc.)
- Basic proficiency with Linux/MacOS command line and terminal to use it (VS Code has an integrated terminal, but you can also use iTerm or Terminal on Mac. If you're on Linux, it depends on your distribution.)
- Obsidian Publish subscription
- A Fly.io account
- A domain name (in this example, I'll be walking through configuration with Namecheap)
Goals
- Host your Obsidian Publish site on your own domain
- Enhance your existing published site with metadata for your site
Learning Goals
- What is a reverse proxy?
What You'll Learn
- Setup a Fly.io app
- Create a configuration file to serve your Obsidian Publish site
- Add a way to add metadata to the page that is served
- Deploy a reverse proxy
- Setup a domain to point to the app
- Verify a static HTML response
Setting up Fly.io to serve your Obsidian Publish site
Setup a Fly.io App
Before setting up a fly.io app, you'll need to have an account. If you don't have one yet, you can visit their Sign up page. Once you've created your account, it will ask you if you want to setup
Install flyctl (TODO)
Create the flyctl app (TODO)
Run flyctl create
After running this command, you should now have a fly.toml in the directory you're working from.
This is the file that the command for deploy will use to provision and configure your app's resources
Create the nginx.conf (TODO)
In your editor, create a file nginx.conf.
This is where all the configuration for your site happens. NGINX uses this configuration to determine what to do when a request comes into your app.
Create the Dockerfile (TODO)
Quick check-in
Fly.io apps are deployed via a terminal by using a fly.toml file (Configuration as Code) and a Dockerfile.
Before you deploy, here are the 3 files you should have (in the same directory) and a recap of what they do:
fly.toml- This is the file that the command fordeploywill use to provision and configure your app's resourcesDockerfile- Fly.io creates a container with thisDockerfileso that it can serve the container as the app.nginx.conf- This is where all the magic for your site happens. NGINX uses this configuration to determine what to do when a request comes into your app.
Deploy your Fly.io app (TODO)
Verify your work (TODO)
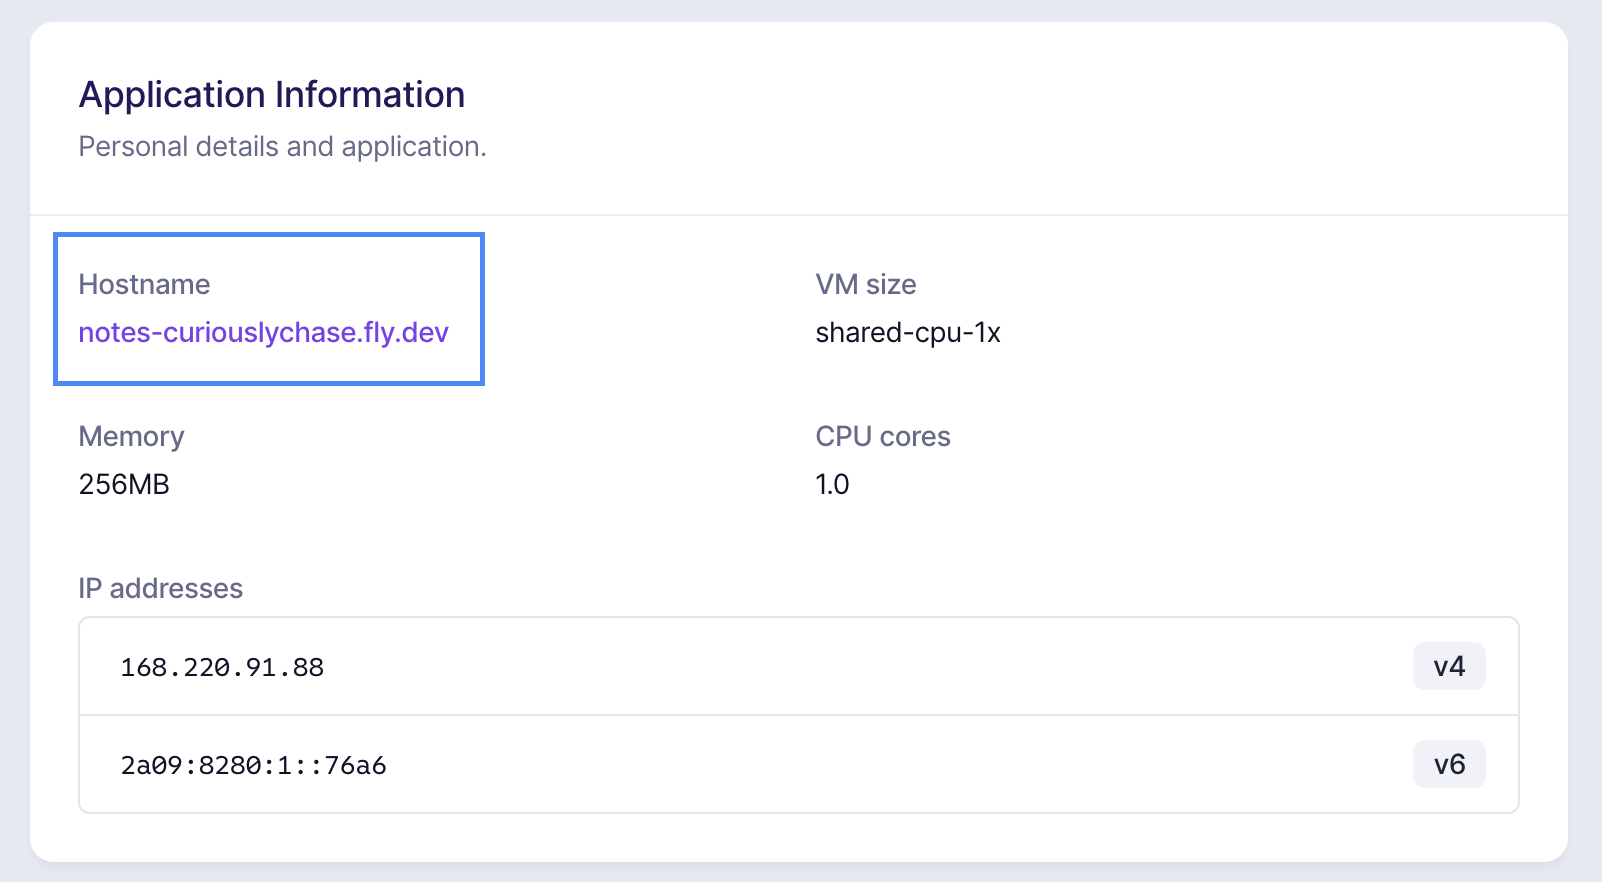
Now you should be able to visit the Hostname that you found in Your fly.io app overview.
In my case, it's notes-curiouslychase.fly.dev:
Point your domain name at your Fly.io app
Get IP Addresses from Fly.io (TODO)
Add A record to point to IP Address (TODO)
Provision certificates on Fly.io (TODO)
Now you wait
One of the downsides to DNS is that you have to wait for a new record to propagate from your Domain Registrar to your computer.
That means you could be waiting anywhere from 5 minutes to 24 hours, so be patient!
One way to verify your changes are propagated is to visit DNS Checker and check what IP addresses show. To do this:
- add the hostname you're using (in my case, notes.curiouslychase.com)
- make sure it says "A" in the select box for the DNS record type
- click Search
If all goes well, you should see a list of...
- location somewhere around the world
- IP address your site points to
- A checkmark
The IP address should match the IP address of your Fly.io application.
Here's an example of mine:
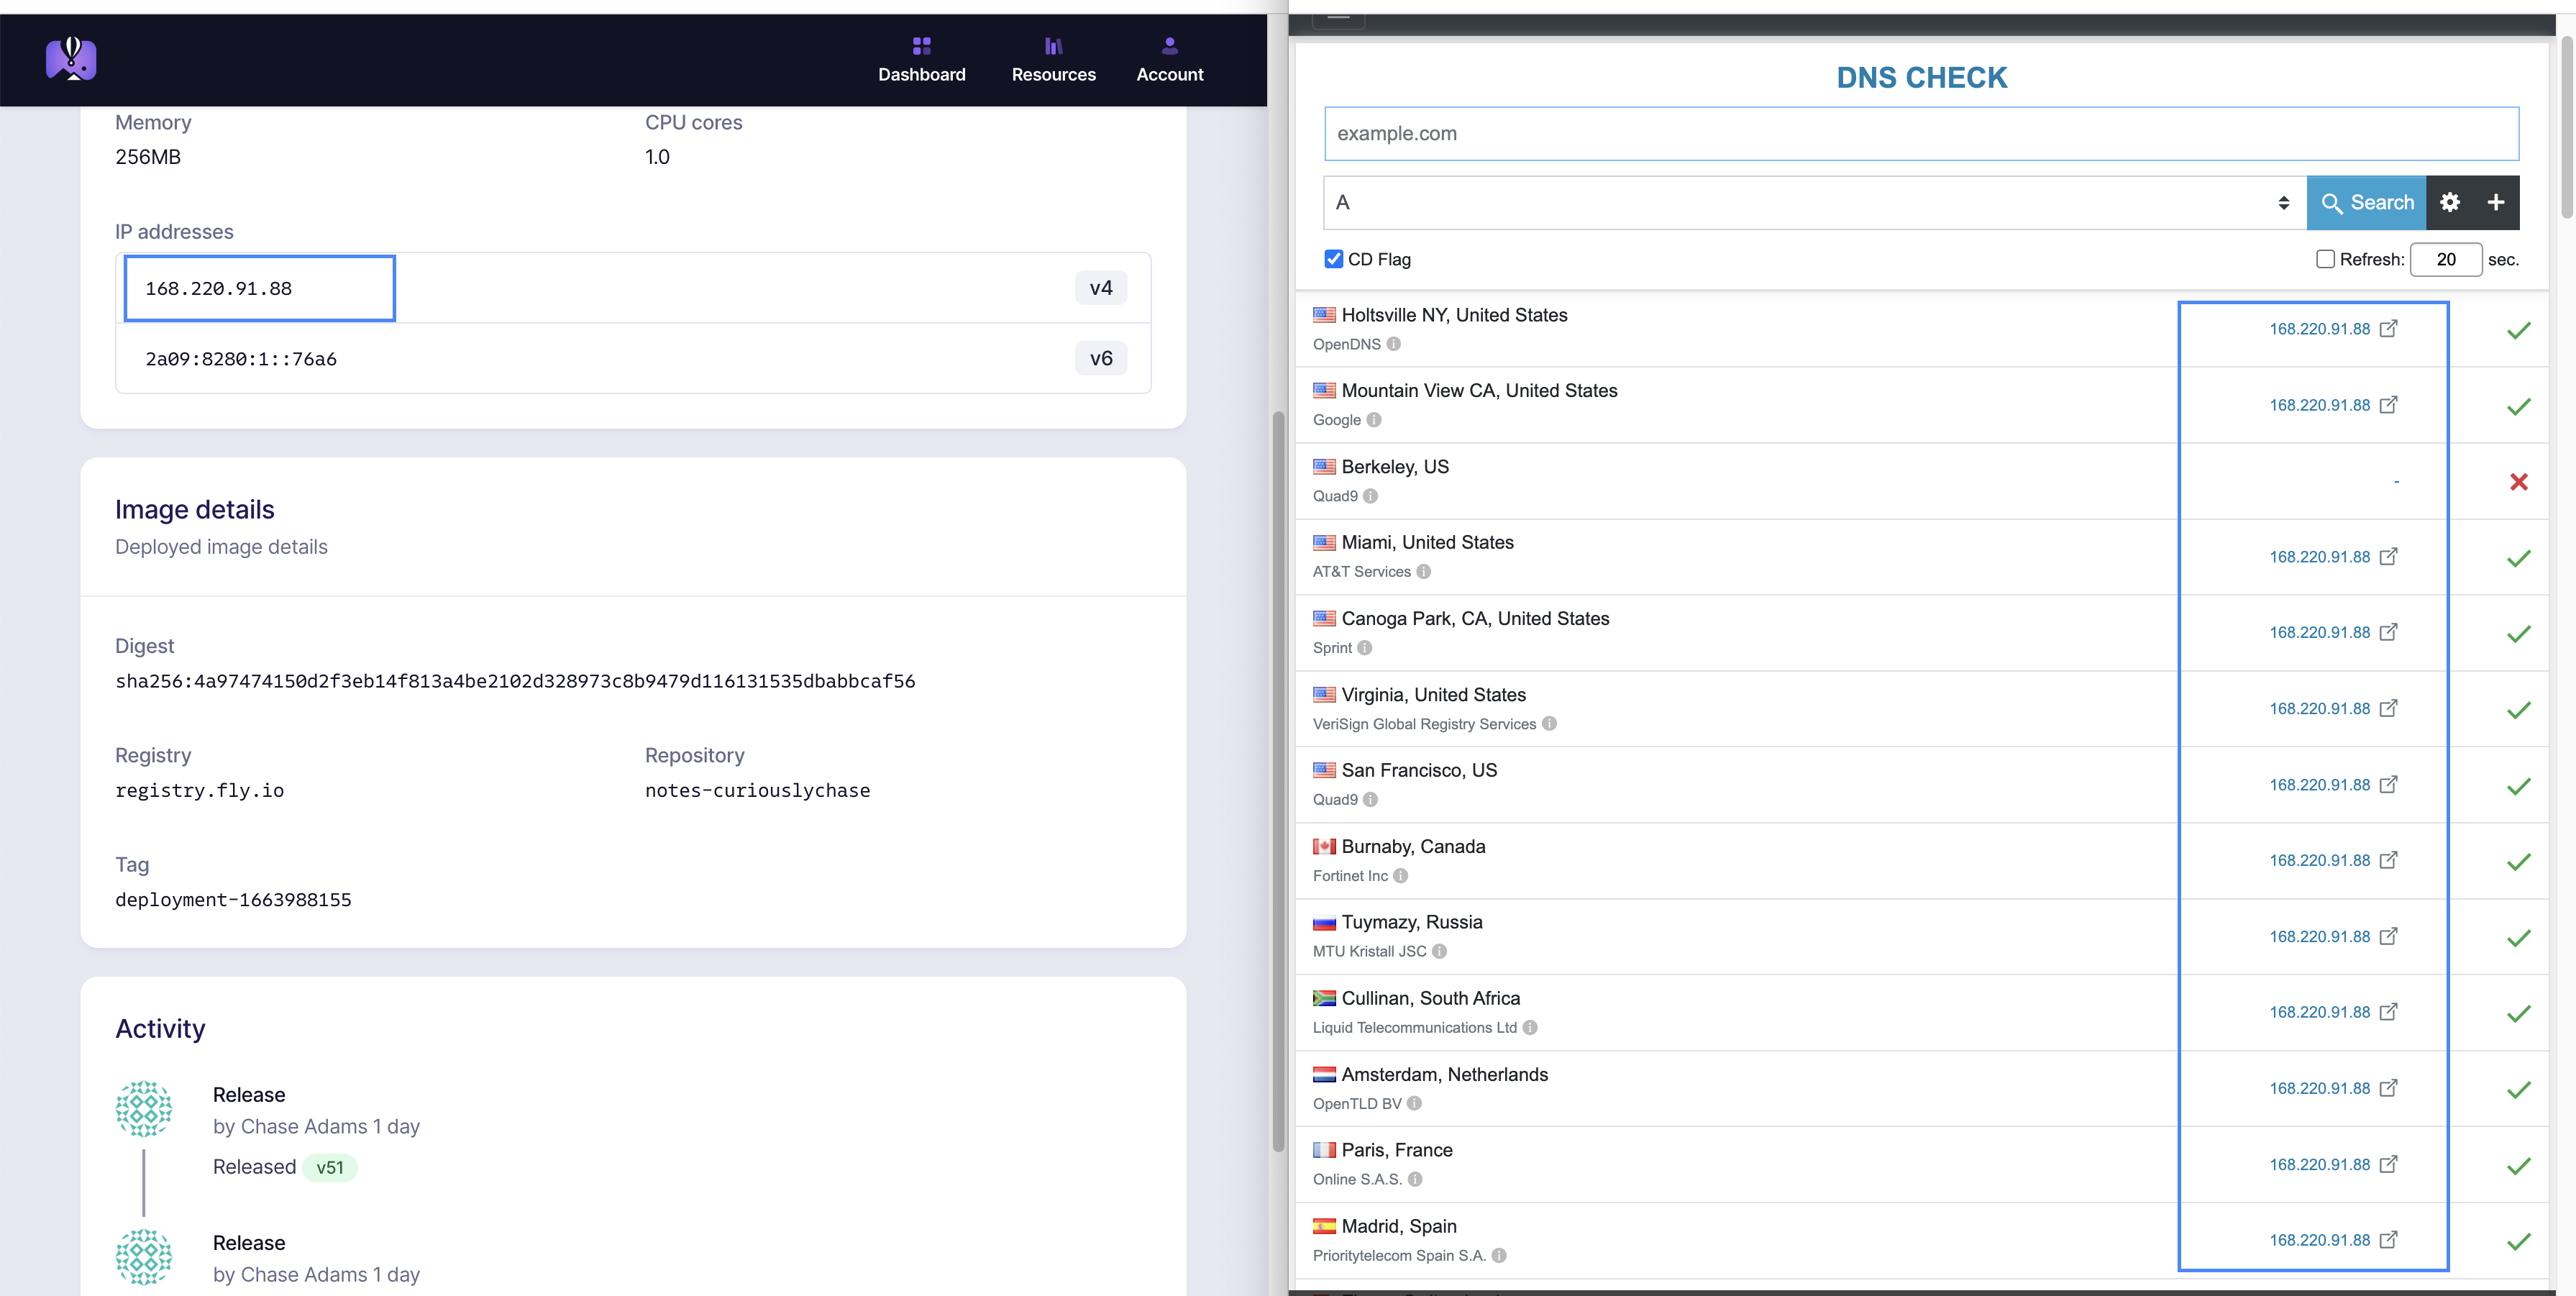
I have no idea why "Berkeley" has an ❌. If anyone is in Berkeley or has an idea of why, feel free to let me know on Twitter!
Wrapping Up (TODO)
Notes
Disable Port in Redirect
I noticed when I was adding rewrite rules (using curl to debug), that the location's listen port was included in the redirect URL.
In order to disable that, in my nginx.conf, I had to add the following:
port_in_redirect off;
Don't forget to escape + on rewrite source
In order to use rewrite to redirect a path that changes in sites deployed with Obsidian Publish, you need to escape the + symbols.
As an example, if I want to redirect /MongoDB+Queries, I need to escape with \ in the source because it's using a Regular Expression. The destination does not need the same treatment.
rewrite ^/MongoDB\+Queries$ /20+-+Notes/MongoDB permanent;
Links
Complete Files
fly.toml
app = "notes-curiouslychase"

kill_signal = "SIGINT"
kill_timeout = 5
processes = []

[env]
PARAMS = "--with-http_sub_module"

[experimental]

  allowed_public_ports = []
  auto_rollback = true

[[services]]
  http_checks = []
  internal_port = 8080
  processes = ["app"]
  protocol = "tcp"
  script_checks = []

  [services.concurrency]
    hard_limit = 25
    soft_limit = 20
    type = "connections"

  [[services.ports]]
    handlers = ["http"]
    port = 80

  [[services.ports]]
    handlers = ["tls", "http"]
    port = 443

  [[services.tcp_checks]]
    grace_period = "1s"
    interval = "15s"
    restart_limit = 0
    timeout = "2s"
Dockerfile
FROM nginx
COPY nginx.conf /etc/nginx/conf.d/nginx.conf
nginx.conf
resolver 8.8.8.8;

server {
	listen 8080;
	listen [::]:8080;

	server_name notes.curiouslychase.com;

	location / {
		if ($http_x_forwarded_proto = "http") {
			return 301 https://$server_name$request_uri;
		}

		set $site "https://publish.obsidian.md/serve?url=notes.curiouslychase.com";
		proxy_pass $site;
		proxy_ssl_protocols TLSv1.2;
		proxy_ssl_server_name on;

	}

}
Build Your Website with AI—No Code Required
Learn to create and deploy professional websites using ChatGPT and Claude. Go from complete beginner to confident website builder.