Rustic Industrial Minimalist Task Desk
7/11/2015
Info
I no longer use this desk, I use an adjustable height sit/stand desk, you can check it out in my desk setup.
As much as I enjoyed working on and using my standing desk, it wasn't built for full-day usage (it wasn't as stable as I need for programming 6+ hours a day). I told Jackie I wanted to look at desks since I'll be working from home for Walmart Labs full time, so we started the quest for the right desk.
We both have high standards for how a desk should look and we both really like the rustic industrial style, so we set out to find something inexpensive (less than $500) and stylish. Just like with the quest for the right standing desk...nothing.
So, in our typical semi-bespoke style, we put together a plan to build a desk on our own!
Here's how we built this beautiful sitting desk and the best part about it? It only took us about 20 minutes to assemble.
Parts
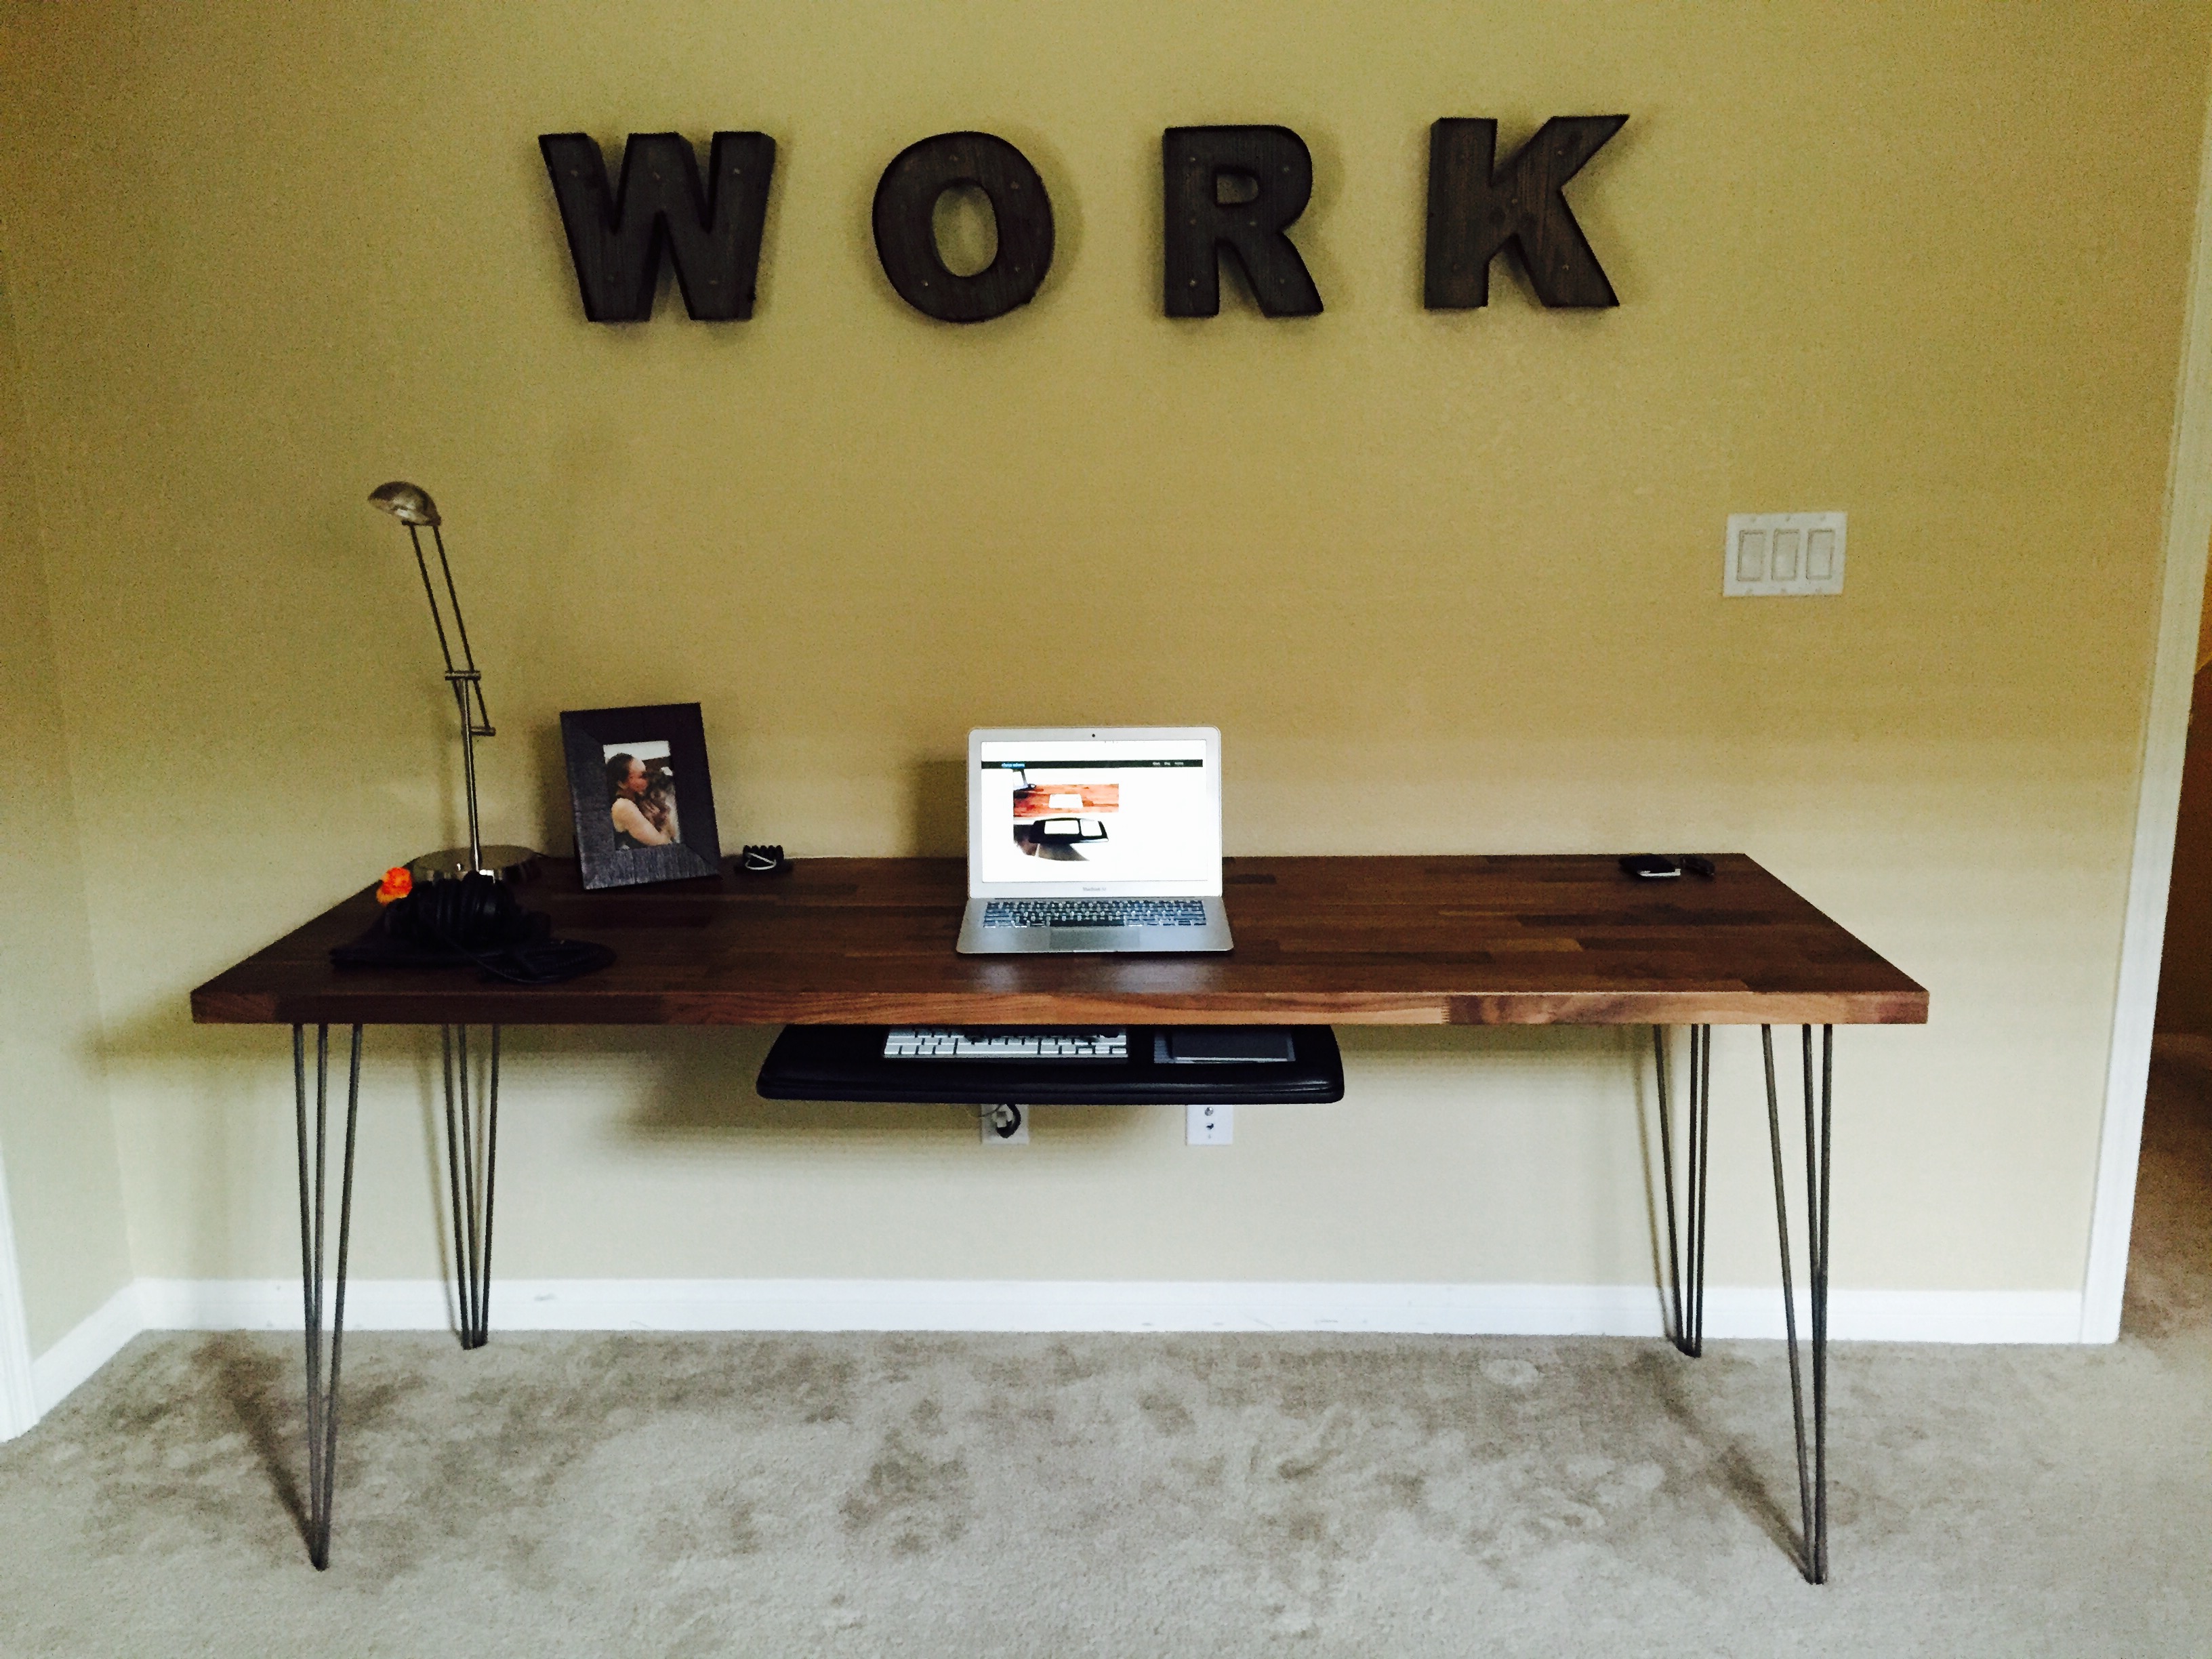
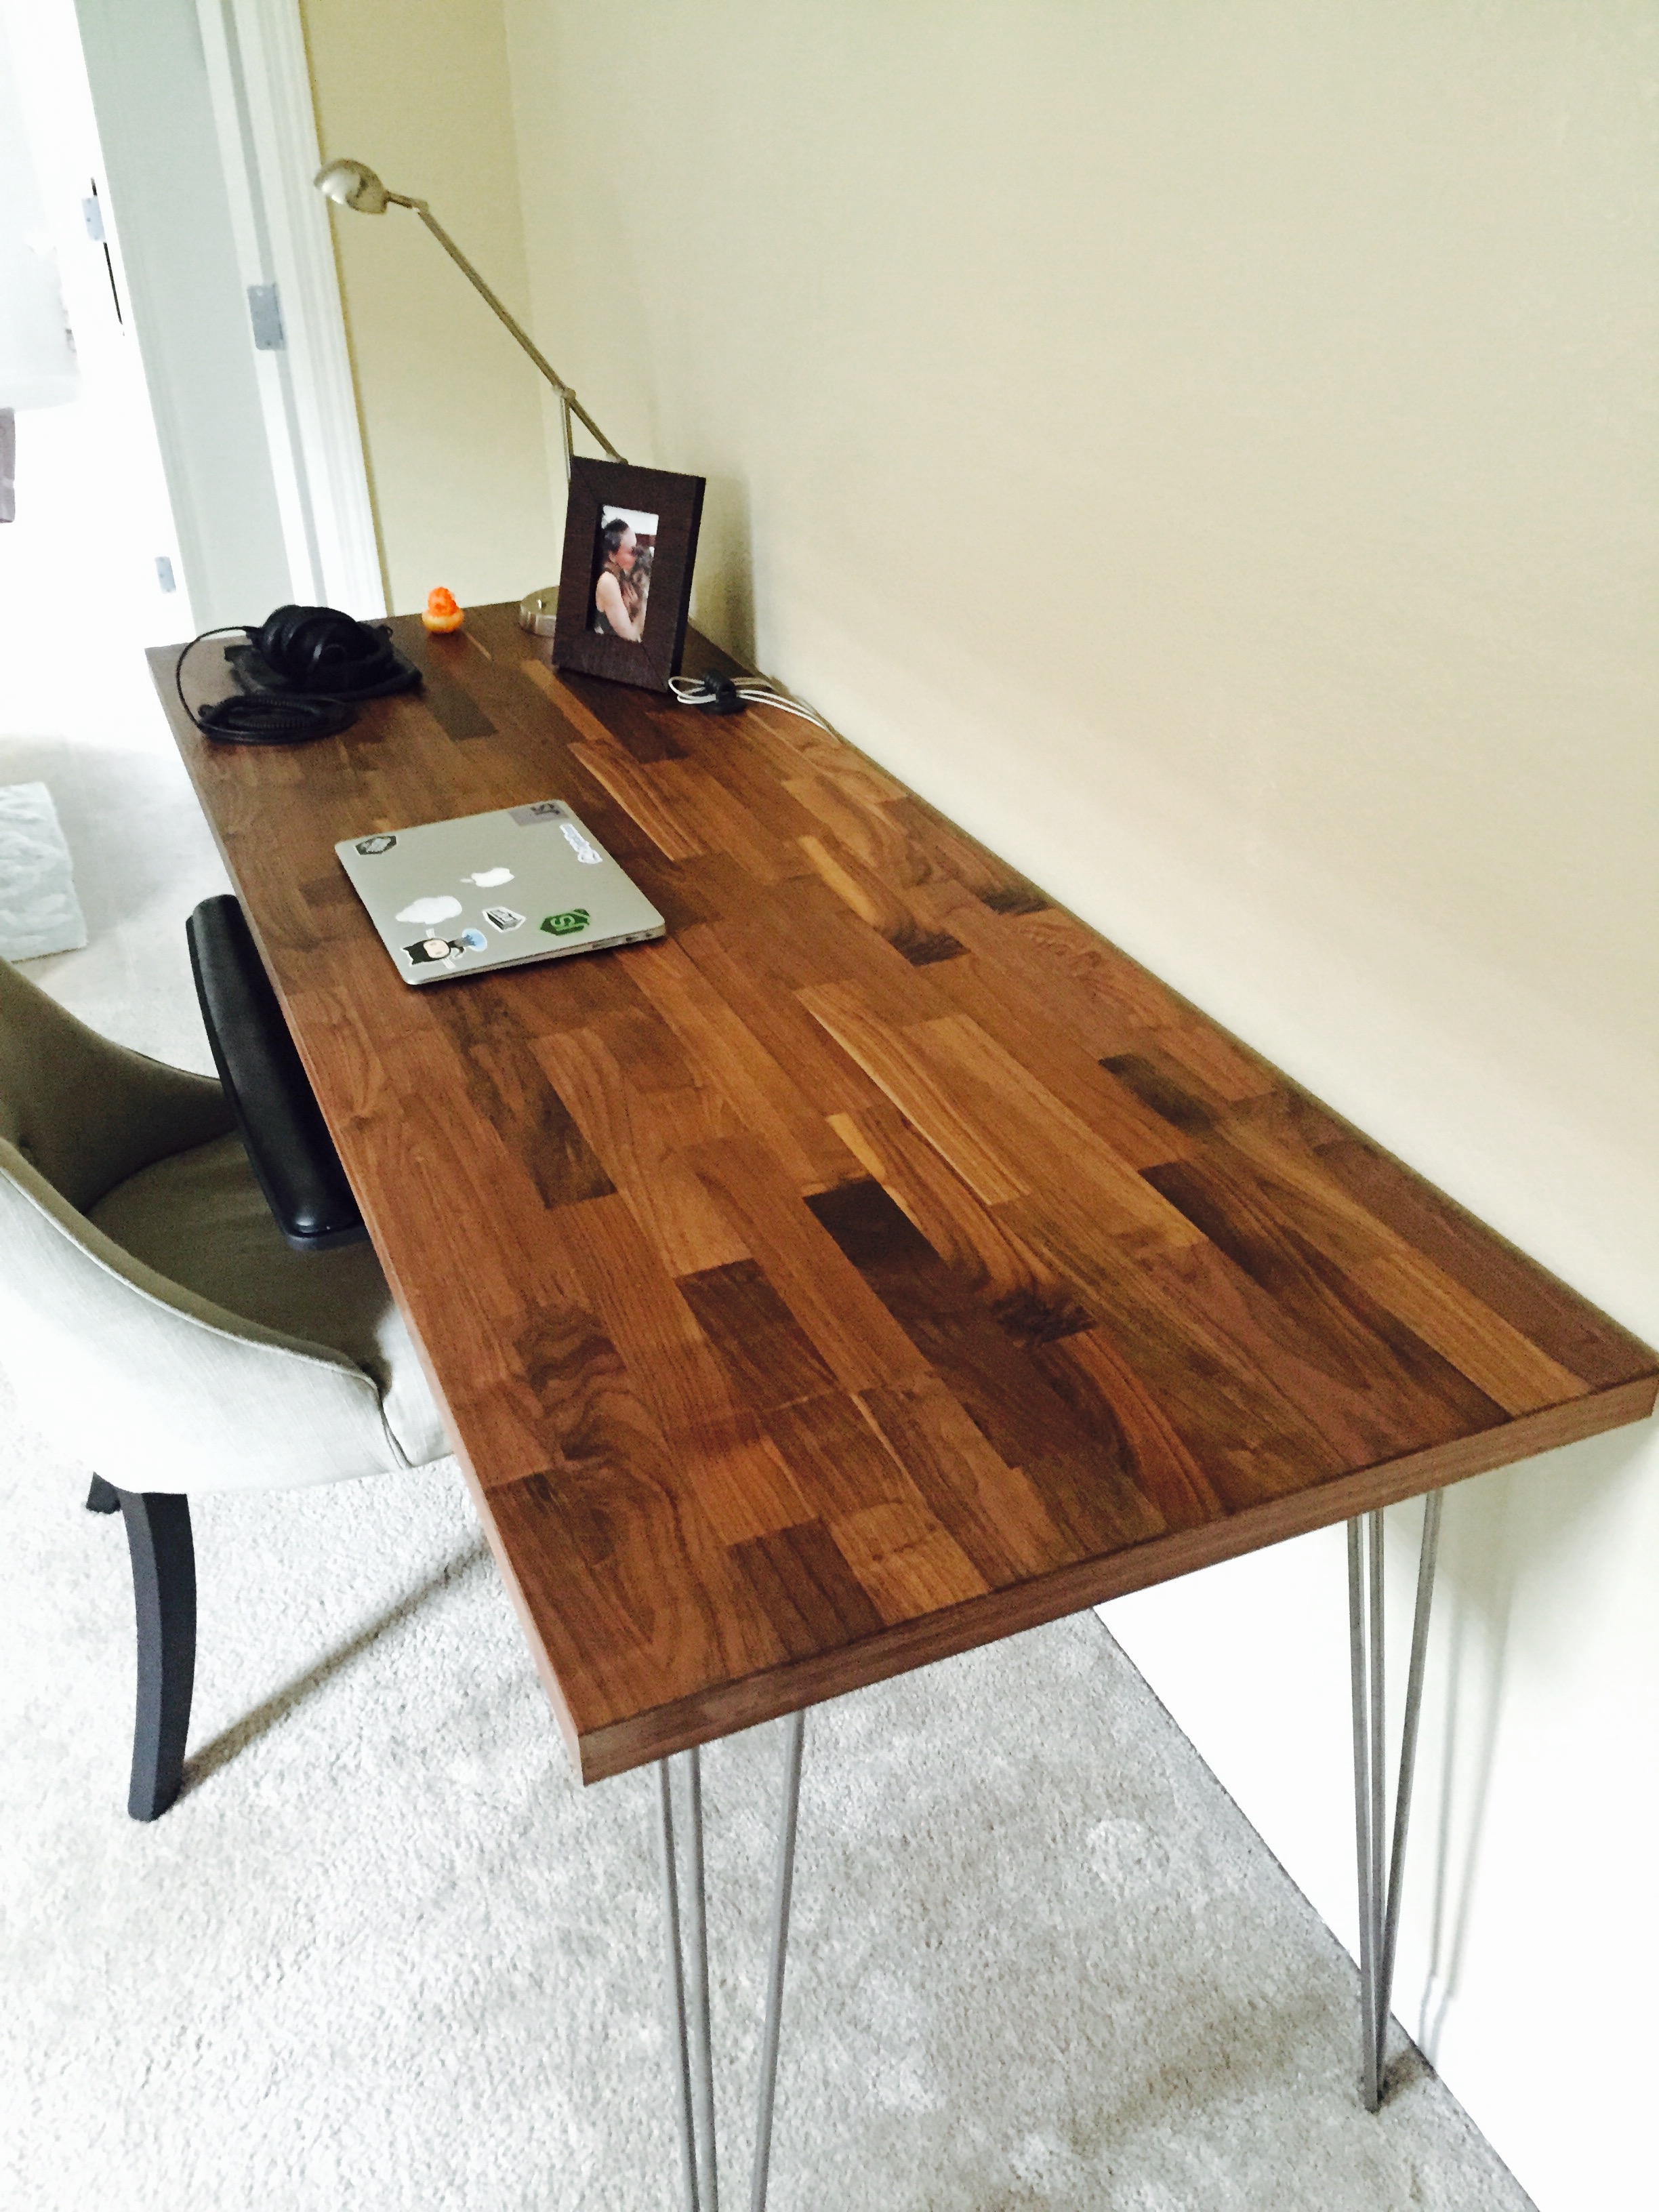
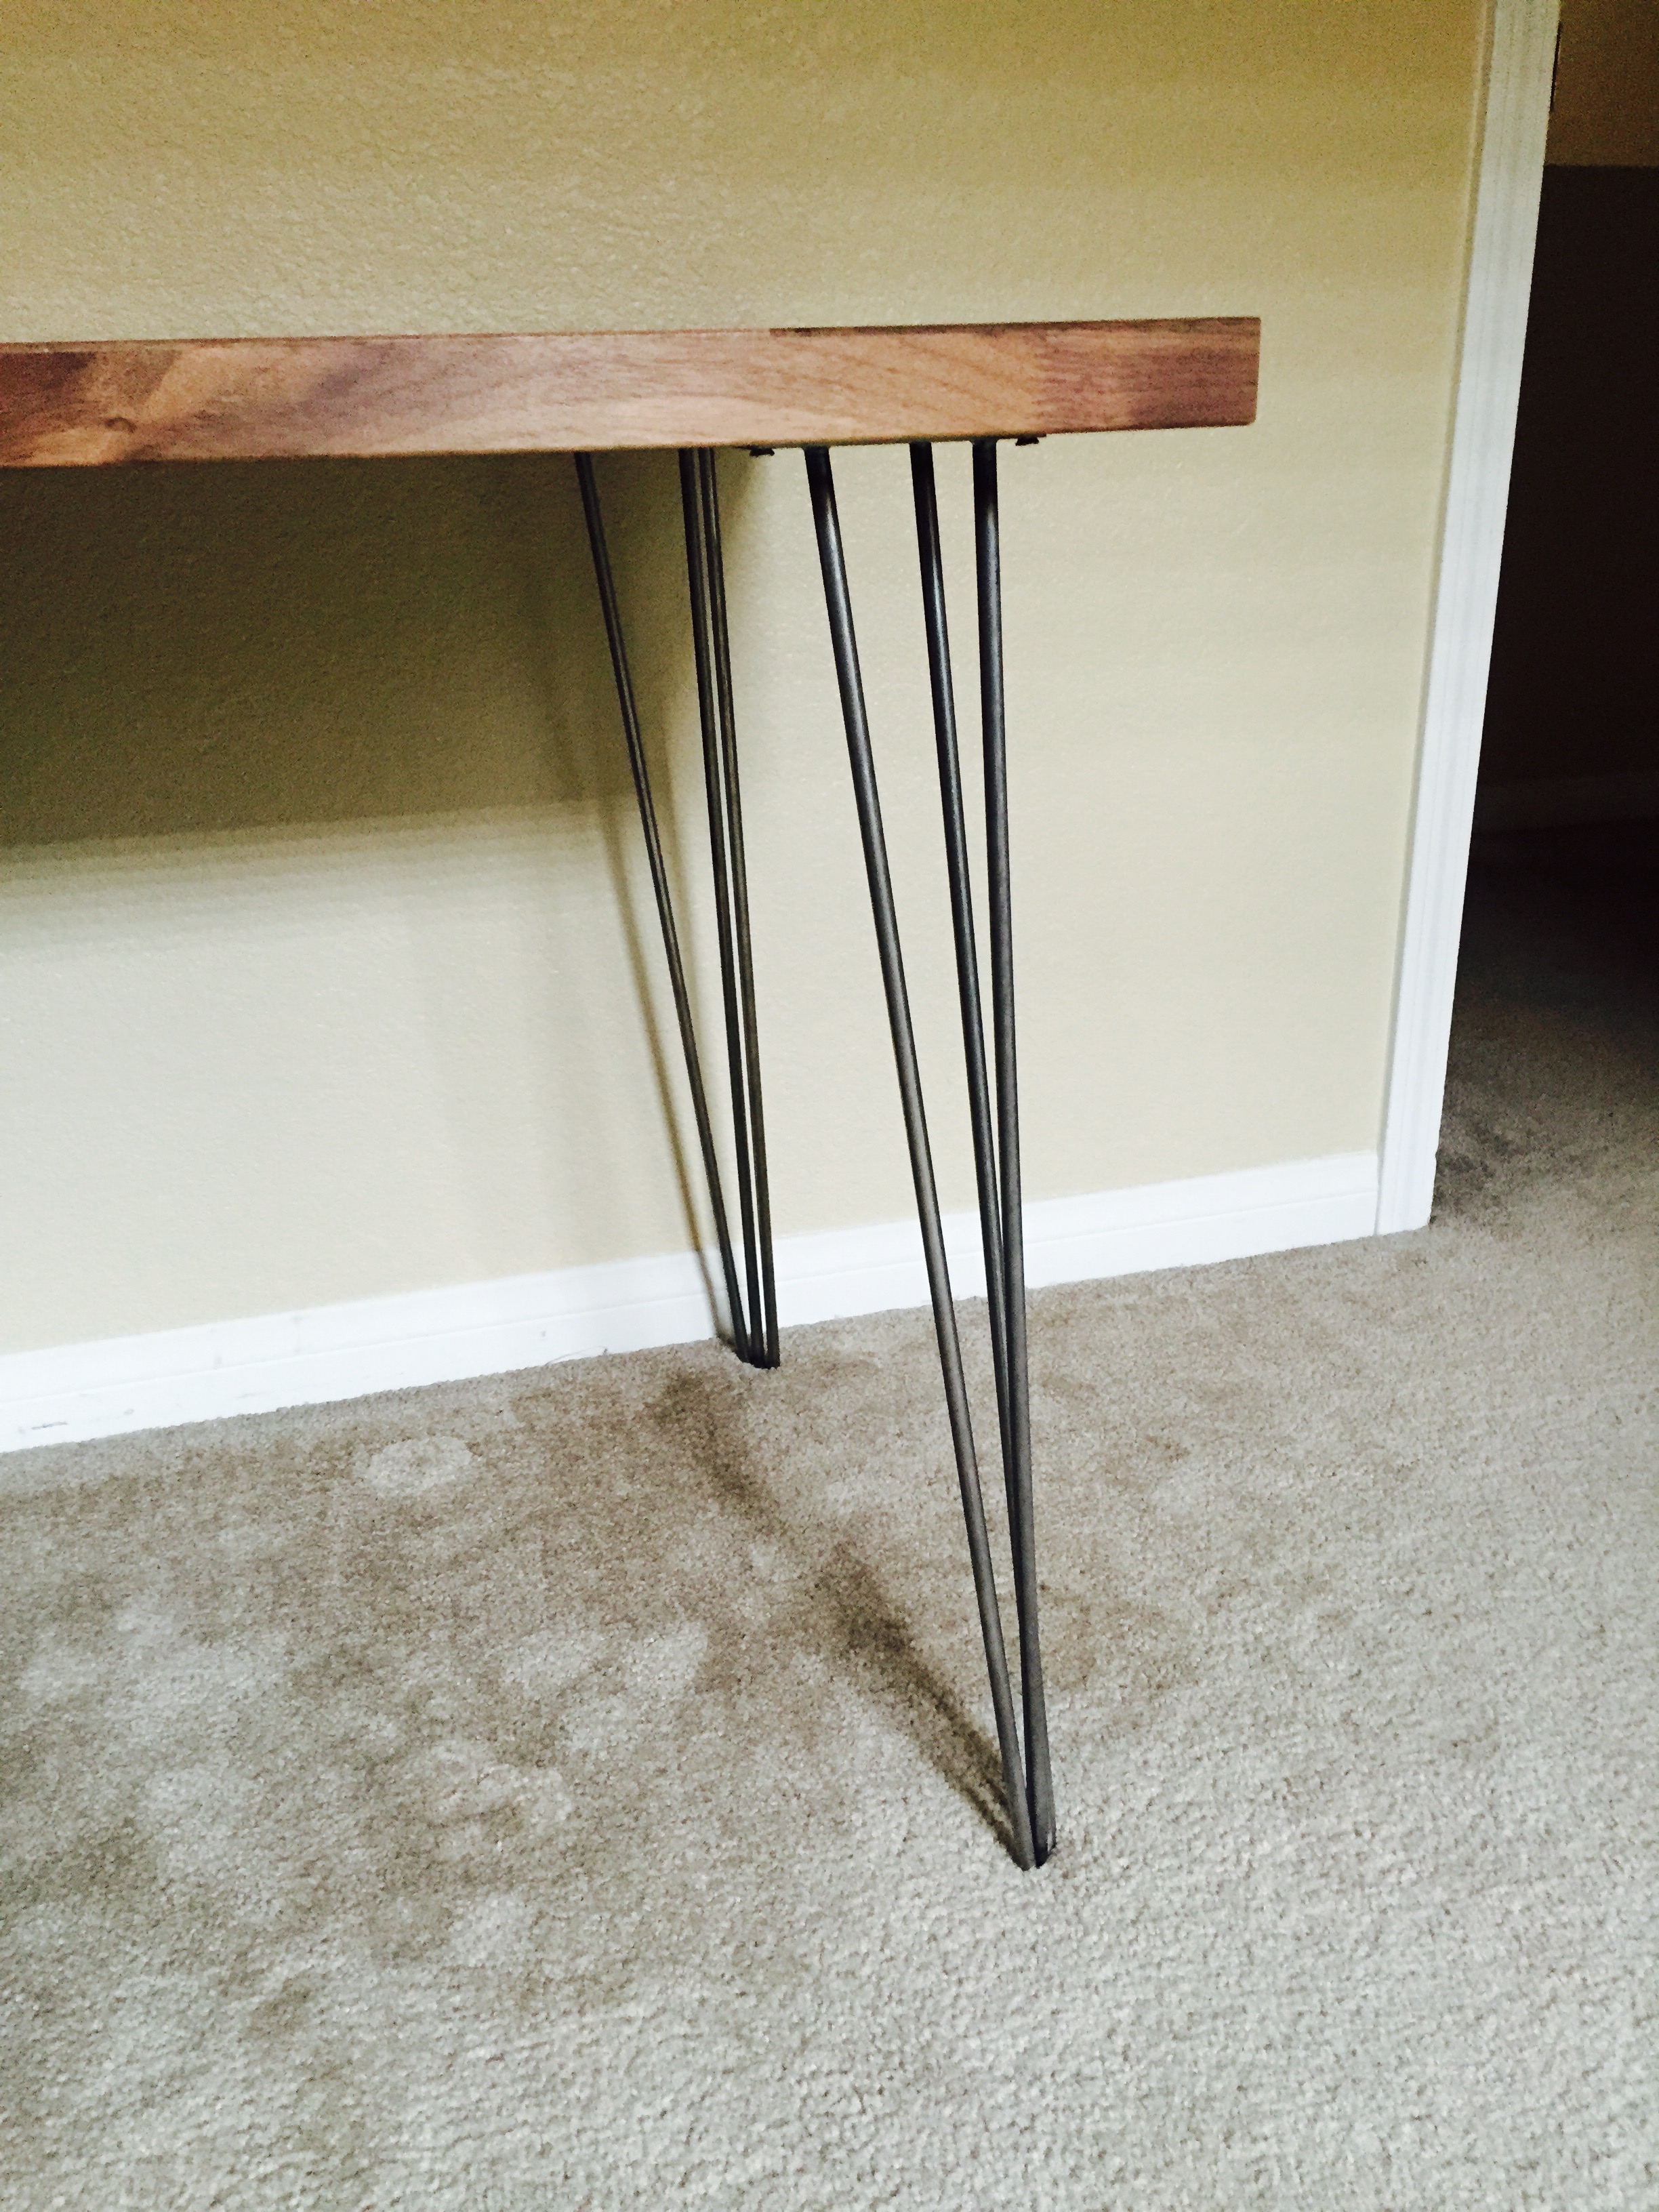
- 28" Raw Steel .375 Diameter 3 Rod Hairpin Leg ($20/leg)
- 74" x 1-1/2" KARLBY Countertop, Walnut ($189.00)
- Everbilt #10 x 1" Flat Head Phillips Wood Screws
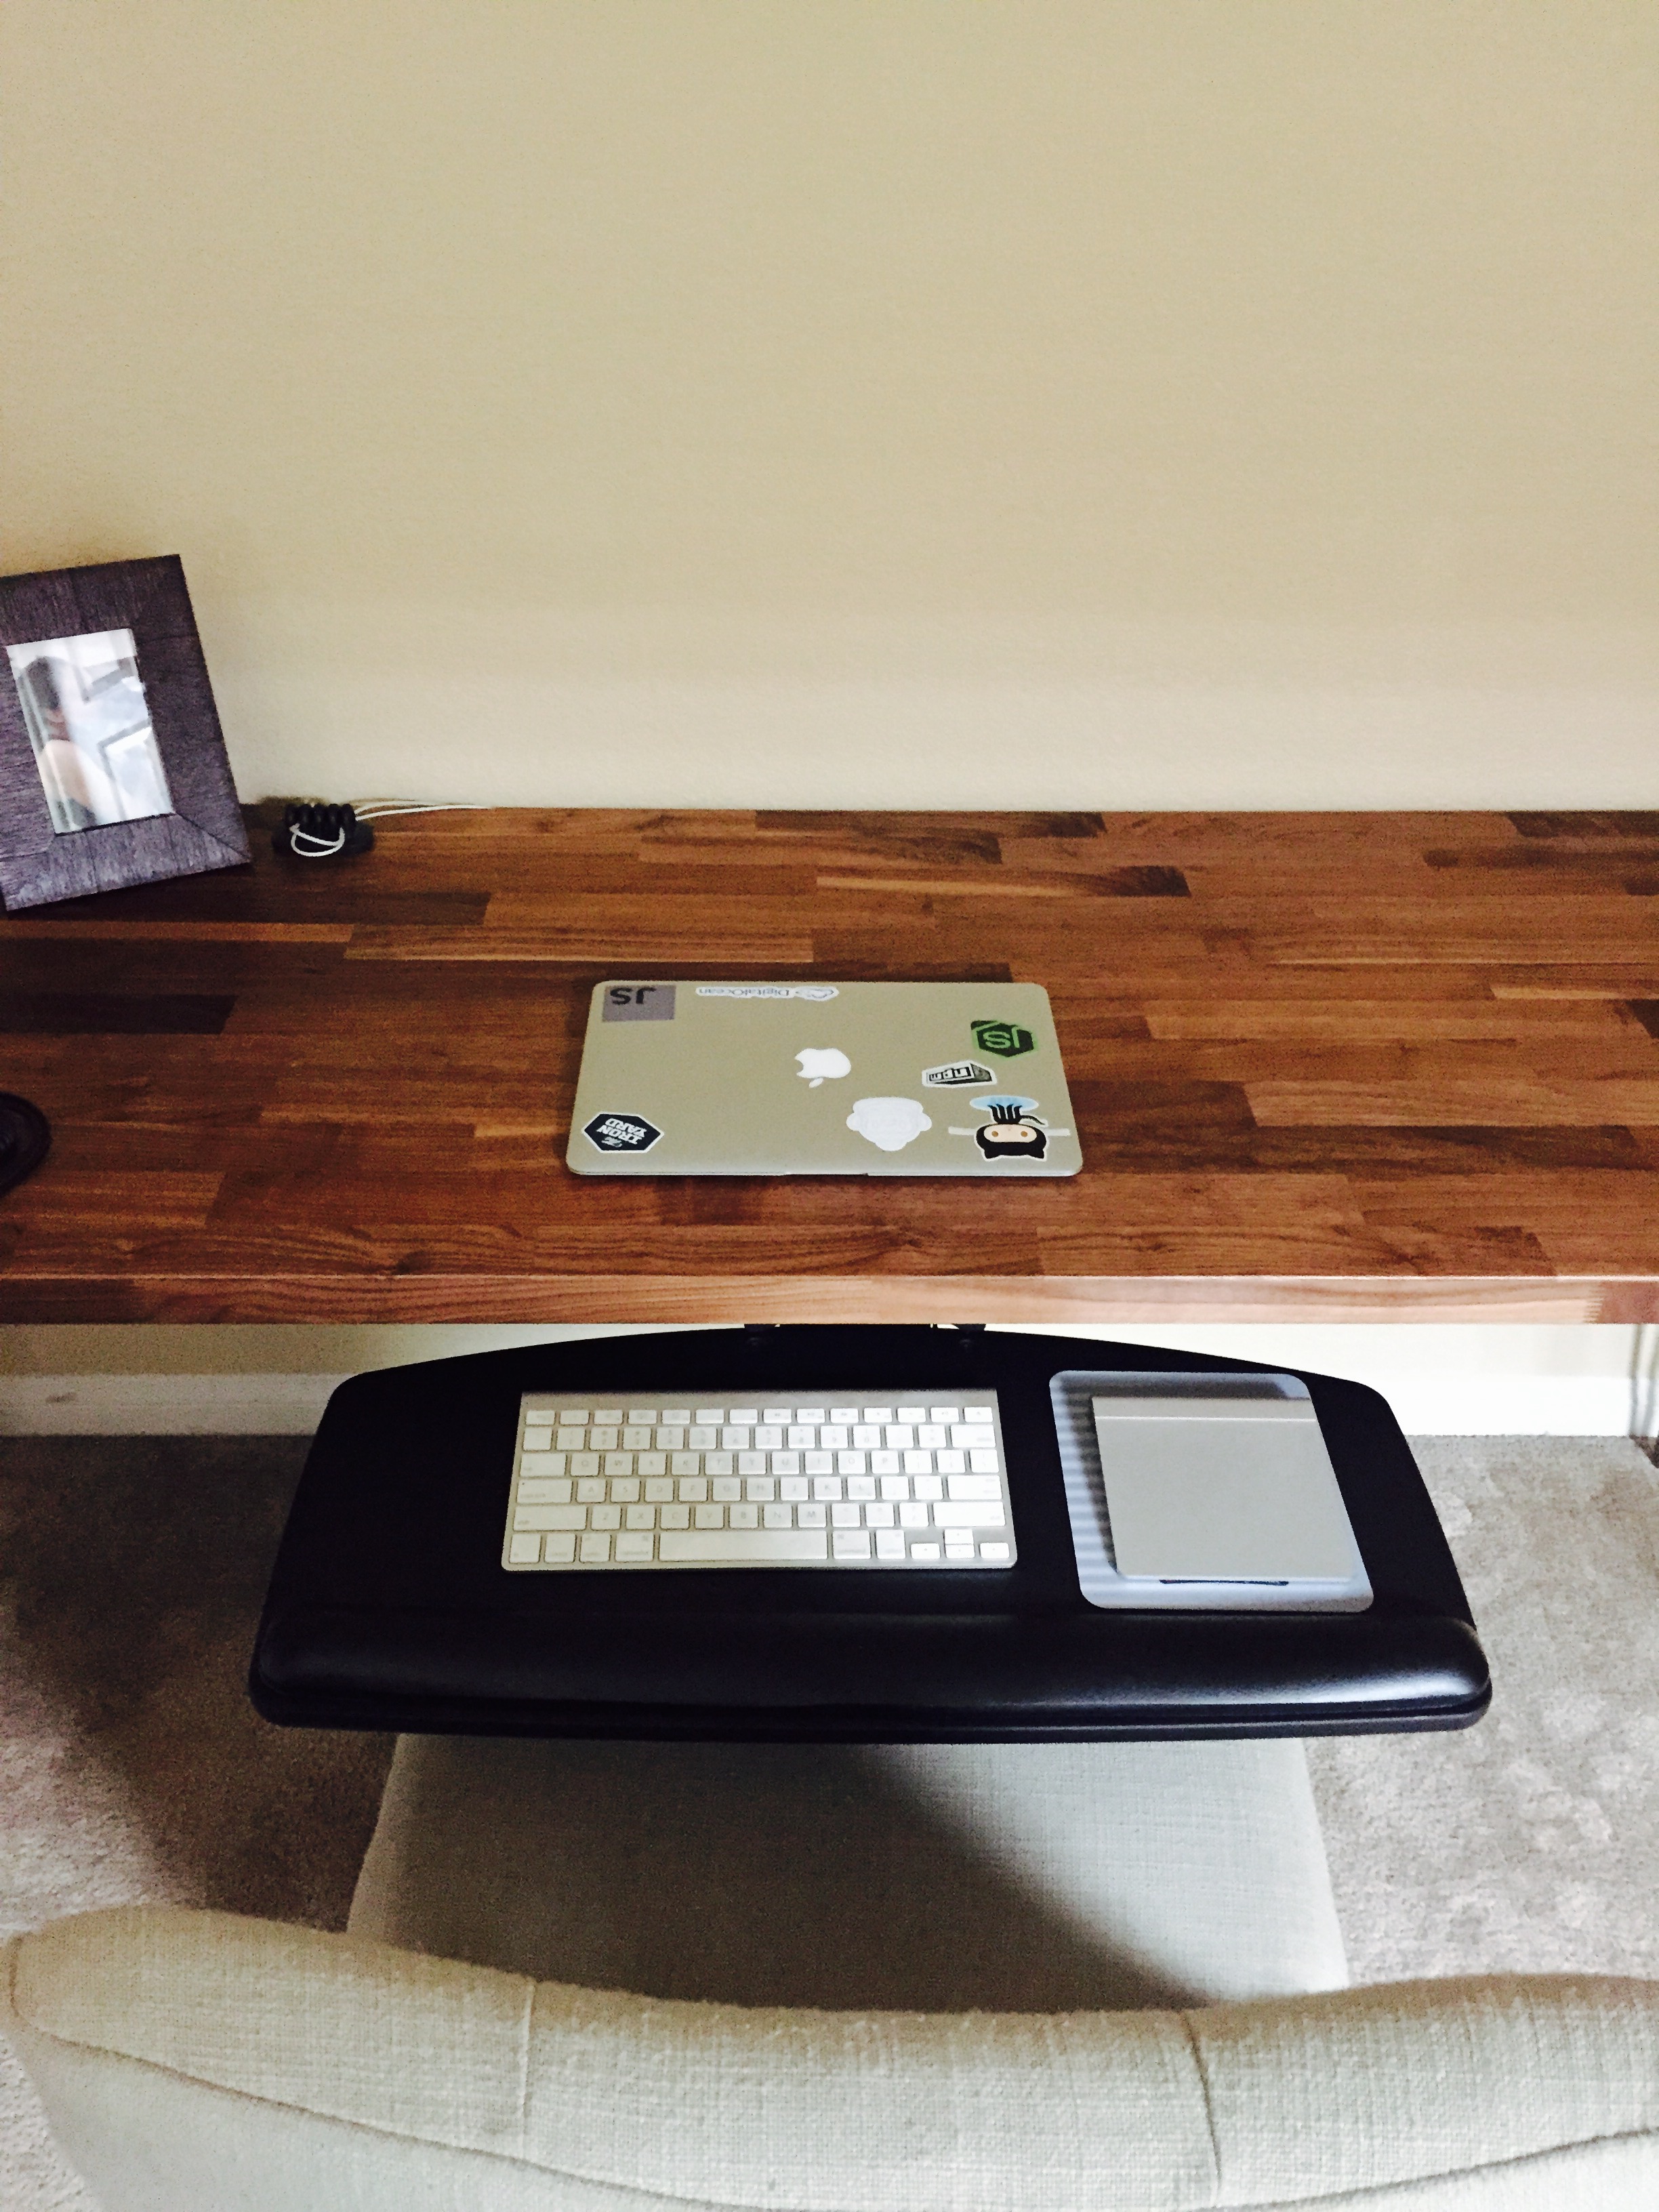
- 3M Knob Adjust Keyboard Tray, Standard Platform, Gel Wrist Rest, Precise Mouse Pad, 17 in Track, Black
Building the Desk
Note: Make sure to not accidentally drill through the table top!
Flip the table! Put the table top upside down on a soft surface (carpet) and make sure you leave plenty of space around the table top so you can move around it easily.
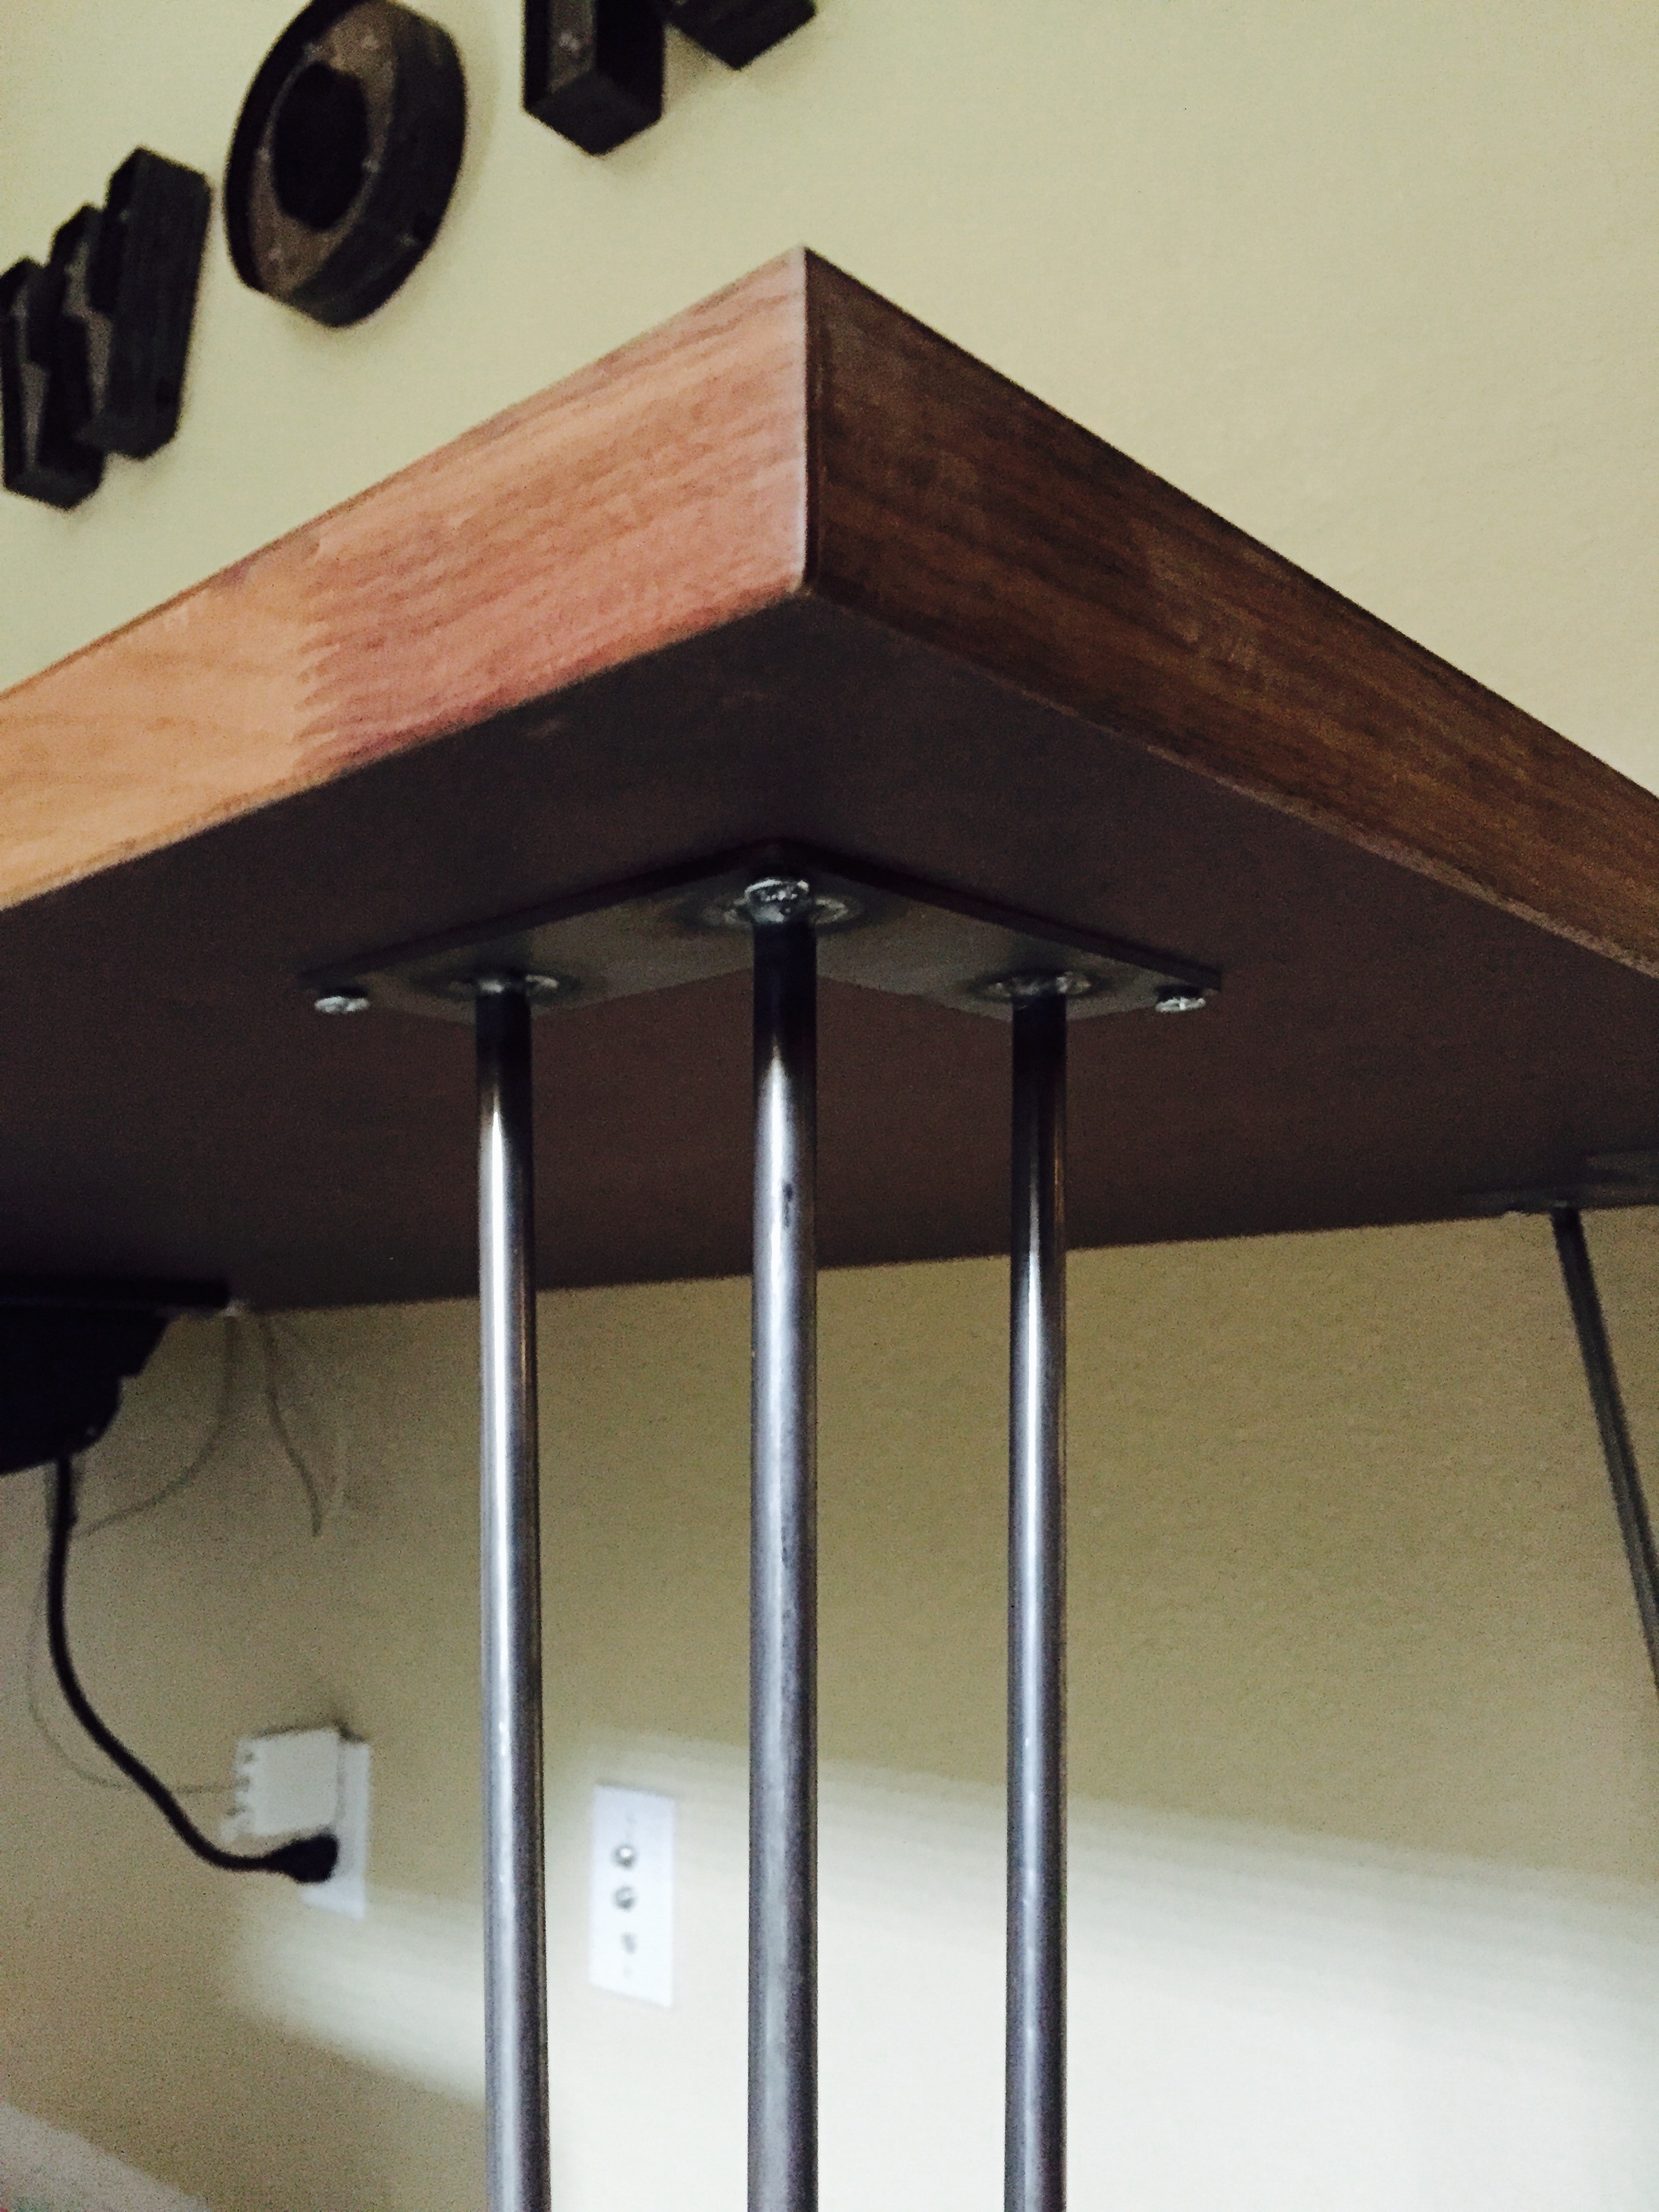
Pre-drill the holes. One thing my dad taught me a long time ago was pre-drill holes. It'll keep wood from splintering or splitting and make it a lot easier to drill the screws in. I measured so that the leg measured 1-1/4" from the edges and held the leg while Jackie marked where the holes needed to be pre-drilled. We pre-drilled three holes for all four legs.
Attach the legs with fasteners. Align the legs over the holes and drill the screws into the pre-drilled holes.
Pre-drill holes for the 3M Keyboard Tray Mount. Place the tray 1-1/4" away from the front edge of the desk. I measured from both side edges to make sure the mount is exactly the same distance from each edge. Mark the holes on the mounting with a marker, remove the tray and pre-drill the holes.
Attach the 3M Keyboard Tray Mount. Place the tray back over the pre-drilled holes and attach the mount to the desk.
Assemble the Tray. Follow the instructions to assemble the tray to the mount.
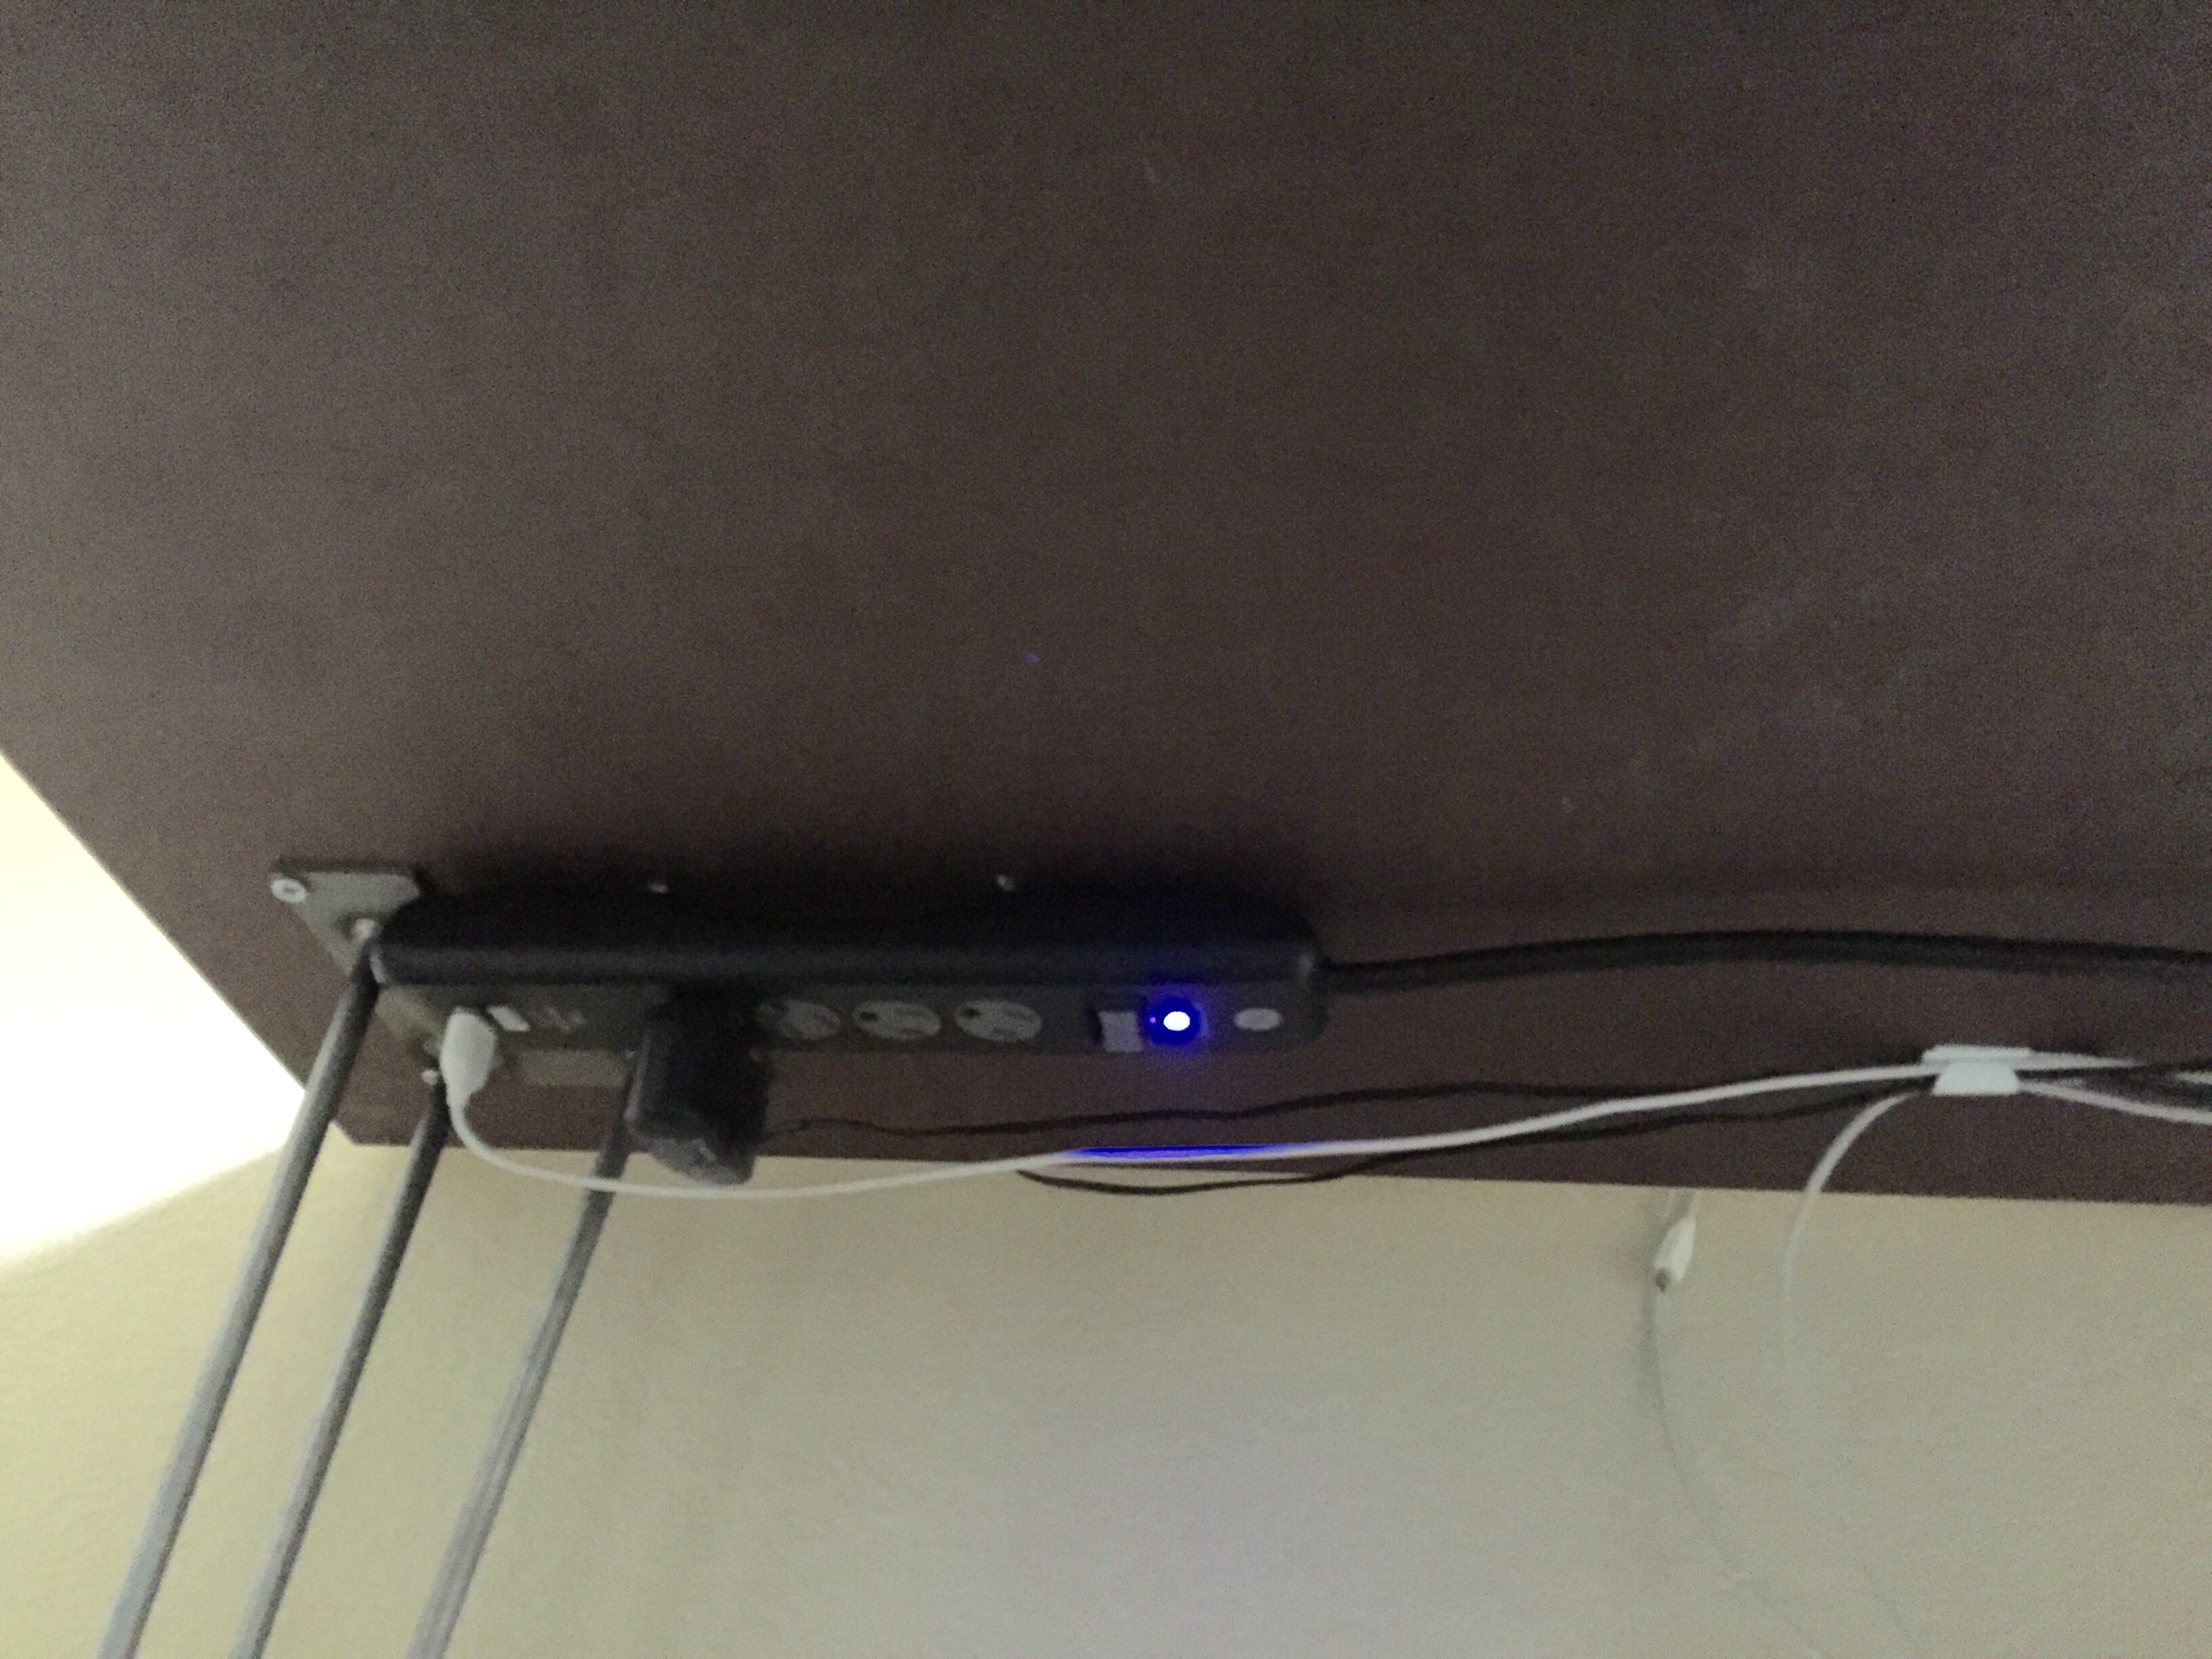
Attach the Powerstrip. My good friend Brandon Murry asked on my last project how I was planning on hiding all the power cords, so I tried to be more concious of it this time. I mounted the powerstrip to the bottom of the desk and used a combination of mug hooks and 3m cord clip cable organizers which made the cables "virtually" invisible without you crawl under the desk. Even if you crawl under the desk, they look a lot better than they did with the standing desk.
The most "involved" part of building this desk is assembling the tray for the keyboard, but we were still able to put it all together in under 30 minutes.
Finished Task Desk
Full View of Desk
Full View of Hairpin Leg
Attached Hairpin Leg to Desk Top
Attached Tray
Attached Powerstrip
Have you built a desk like this? If so, be sure to share photos!